> ## Documentation Index
> Fetch the complete documentation index at: https://docs.interactly.ai/llms.txt
> Use this file to discover all available pages before exploring further.
# Building a Workflow
> Learn how to build a workflow from scratch — adding nodes, connecting edges, attaching tools, setting global variables, and publishing a version for live execution
# About
Workflows are built as a graph of connected nodes and edges in the Interactly dashboard. Each workflow starts with a blank canvas — you add nodes for each step of your process, connect them with edges to define the execution flow, and publish a version when ready.
Every workflow is version-controlled from the moment it's created. Version 0 is automatically generated on creation — you can iterate freely and publish new versions without affecting live executions.
## Creating Your Workflow
1. Navigate to your Interactly dashboard
2. Click the **Workflows** tab
3. Click **New Workflow** to begin
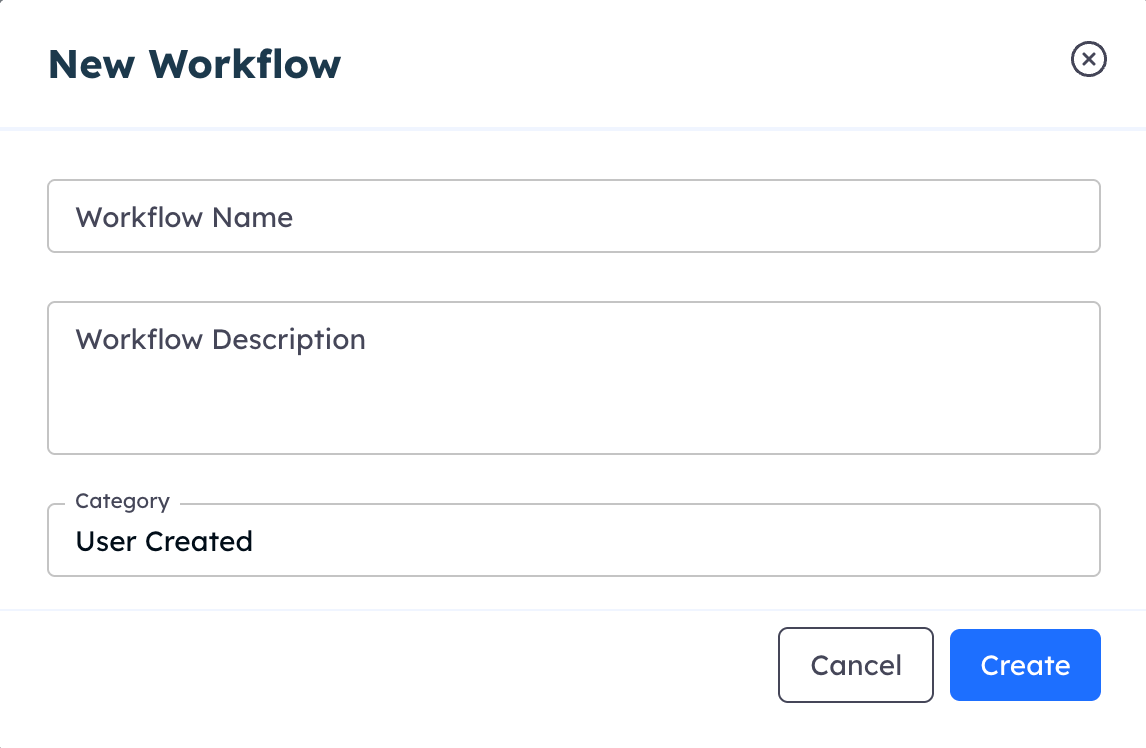 Enter a descriptive name that reflects the workflow's purpose:
* "Patient Intake — Appointment Scheduling"
* "Post-Call Follow-Up Sequence"
* "Insurance Verification Flow"
* "Outbound Reminder — Prescription Refill"
Optionally add a description and assign a category for organisation. Click **Create** to proceed.
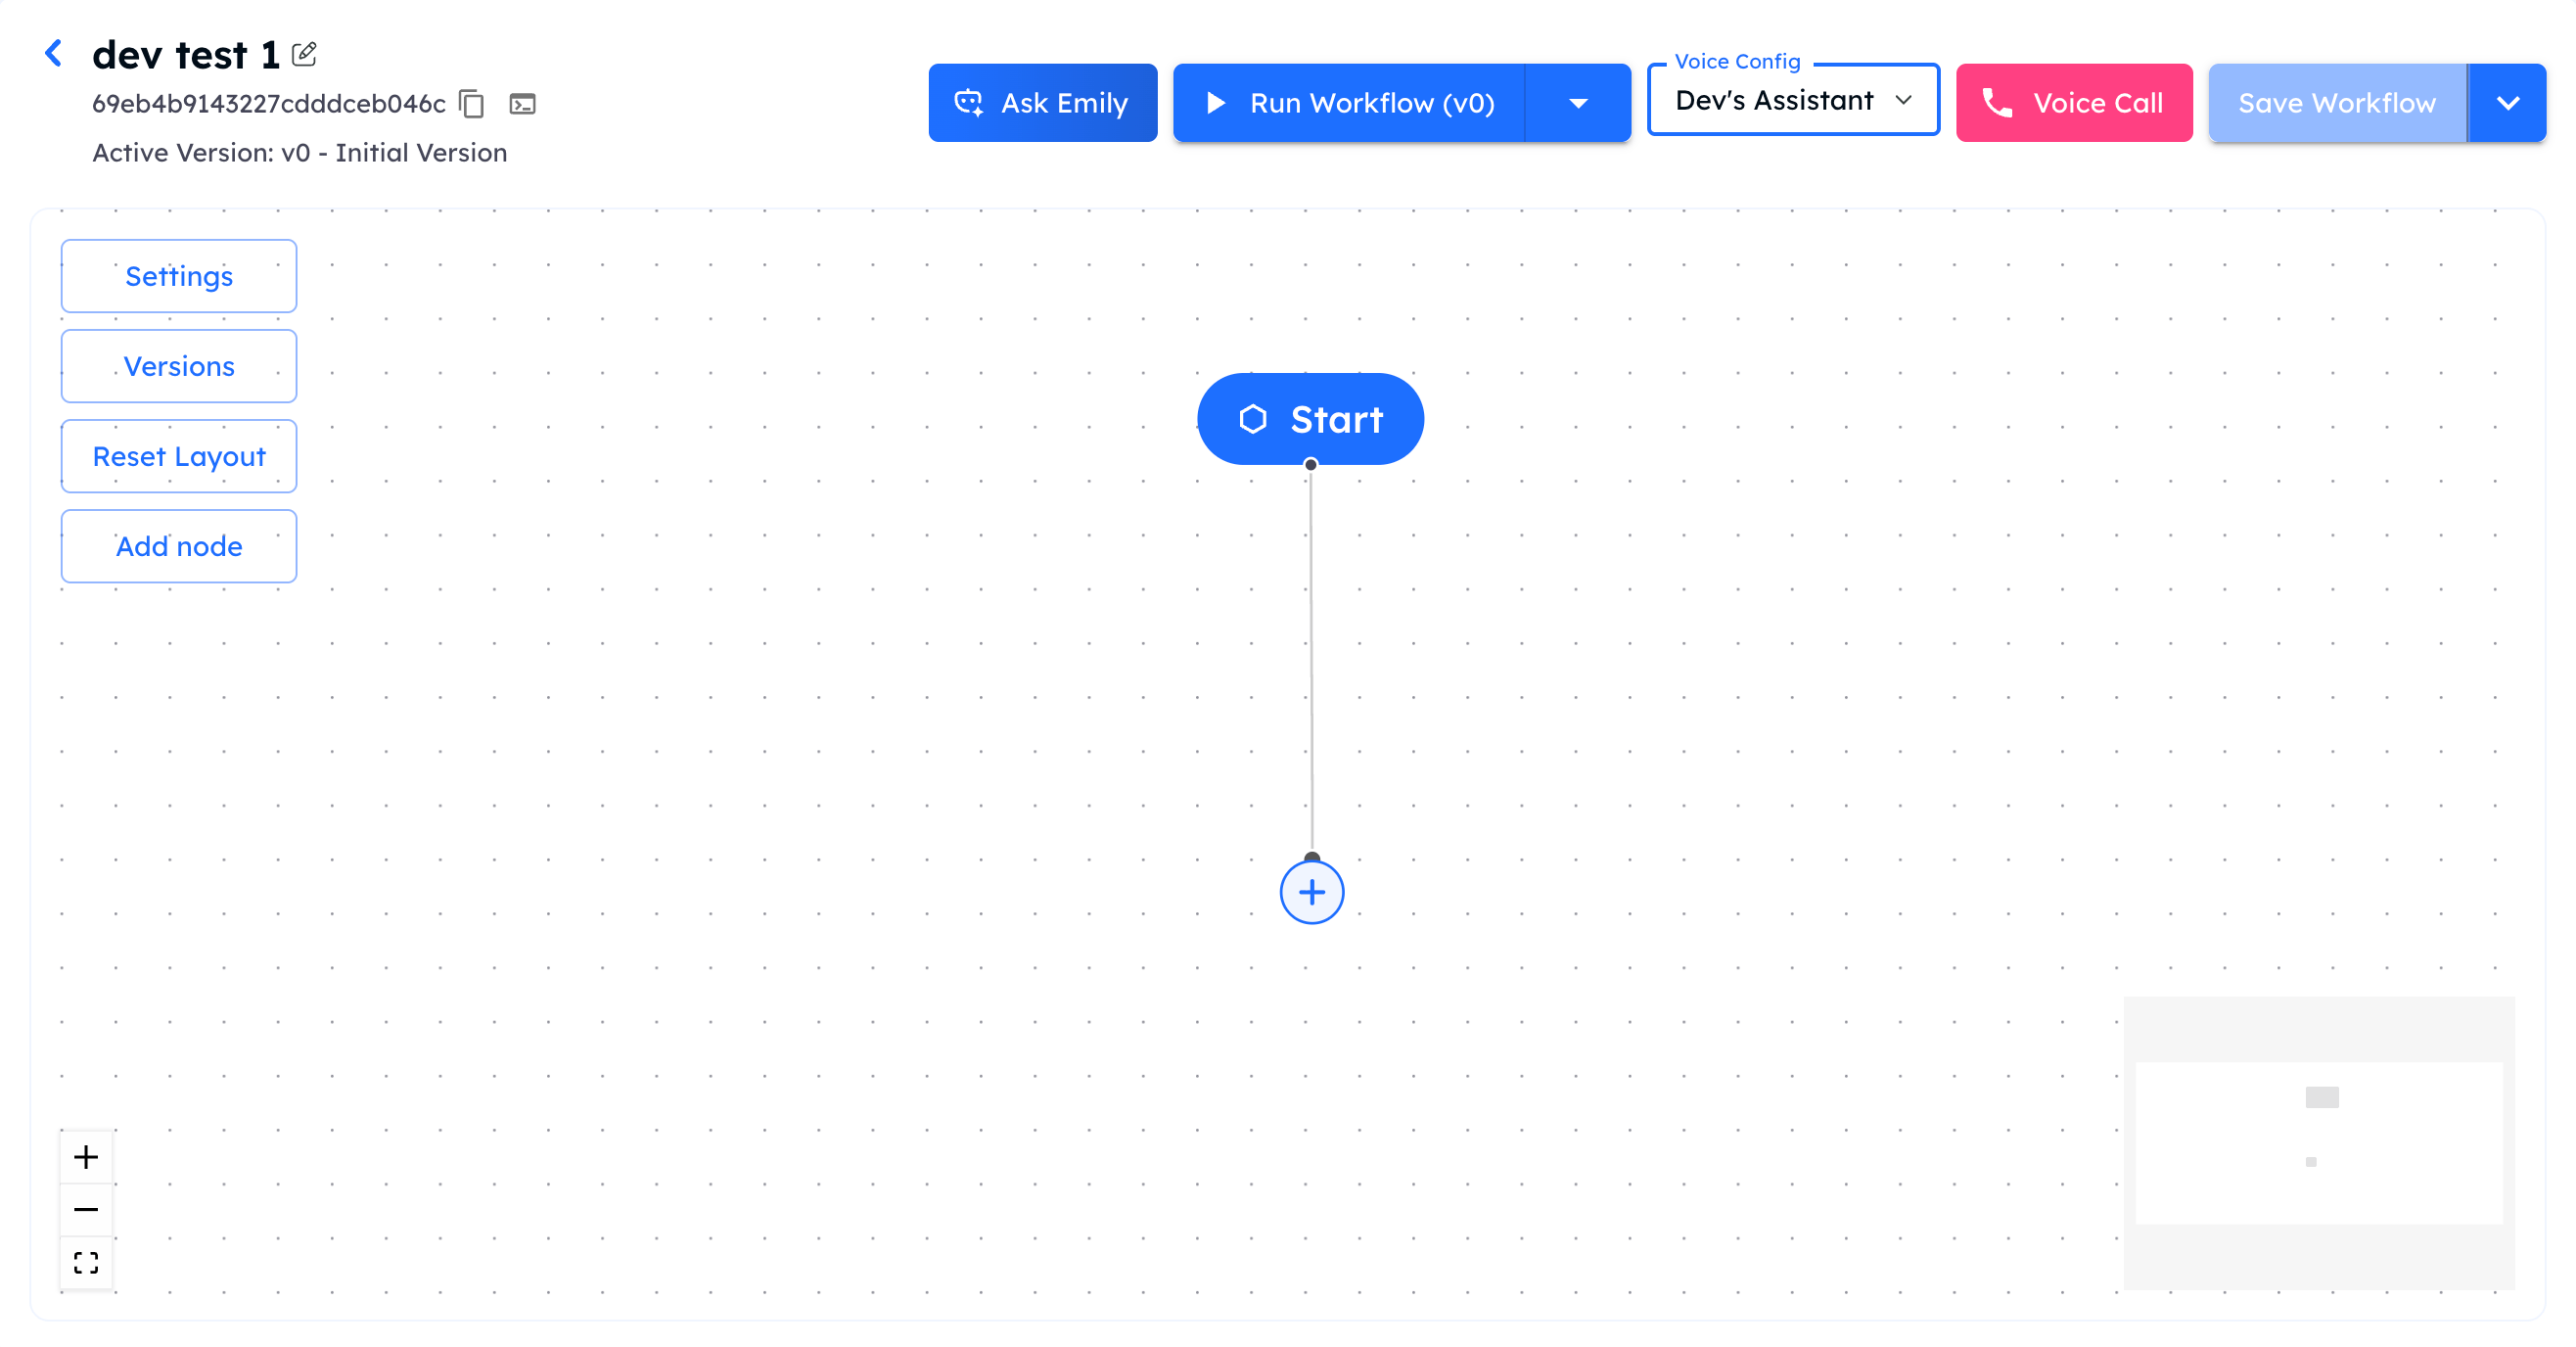
You'll be taken to the visual workflow canvas. This is where you add and connect all nodes.
Enter a descriptive name that reflects the workflow's purpose:
* "Patient Intake — Appointment Scheduling"
* "Post-Call Follow-Up Sequence"
* "Insurance Verification Flow"
* "Outbound Reminder — Prescription Refill"
Optionally add a description and assign a category for organisation. Click **Create** to proceed.
You'll be taken to the visual workflow canvas. This is where you add and connect all nodes.
 ## Adding Nodes
Nodes are the building blocks of a workflow. Each node performs one discrete action — generating an LLM response, calling an API, sending an SMS, or controlling conversation flow.
### Node Categories
**Conversational and reasoning steps**
* `SAY_LLM` — generate a conversational response via LLM
* `WORKER_LLM` — structured output or background reasoning
* `SAY_STATIC` — output a predefined or random static message
**External actions and API calls**
* `TOOL_NODE` — execute a registered tool (function, Python, API, KB)
* `HTTP_REQUEST` — call any REST endpoint directly
**Messaging and call control**
* `SEND_SMS` — send an SMS to the contact
**Internal execution management**
* `WORKFLOW_RUN_FETCH` — retrieve a previous workflow run
* `WORKFLOW_RUN_EVALUATOR` — evaluate run outputs
### Configuring a Node
Click **Add Node** on the canvas or drag a node type from the palette. Each node type has its own configuration panel:
The primary node for LLM-driven conversational responses.
* **Name** — label for this node on the canvas
* **LLM Provider** — select from Azure OpenAI, OpenAI, Google, Anthropic, AWS Bedrock, or Custom
* **Model** — choose the model for this node
* **System Prompt** — instructions for the LLM (supports `{{variable}}` syntax)
* **Tools** — attach tools the LLM can call during this step
* **Max Turns** — limit conversation turns at this node
* **Temperature / Max Tokens** — generation parameters
For background reasoning or structured data extraction — not exposed directly to the user.
* **Name**, **LLM Provider**, **Model** — same as SAY\_LLM
* **System Prompt** — task instructions for the worker
* **Output Schema** — define a JSON schema for structured outputs
* **Tools** — attach tools for extended capabilities
Call any external REST API from within your workflow.
* **URL** — target endpoint (supports `{{variable}}` substitution)
* **Method** — GET, POST, PUT, PATCH, DELETE
* **Headers** — key-value pairs (supports secrets via global variables)
* **Body** — JSON payload (supports `{{variable}}` substitution)
* **Response Mapping** — map response fields to workflow variables
Send an SMS message to the contact mid-workflow.
* **To** — phone number or `{{variable}}` reference
* **Message** — SMS body with `{{variable}}` support
* **Provider** — configured SMS provider for your team
Execute a tool from the tool registry.
* **Tool** — select from registered tools (inbuilt, inline Python, external API, or Knowledge Base)
* **Input Mapping** — map workflow variables to tool input fields
* **Output Mapping** — map tool output fields back to workflow variables
## Connecting Nodes with Edges
Edges define how execution flows between nodes. After placing your nodes, connect them by drawing edges on the canvas.
### Edge Types
**Unconditional transition** — execution moves from the source node to the target node immediately after the source completes.
**Use when:** The next step is always the same, regardless of what happened at the source node.
**LLM-evaluated routing** — a natural language condition is evaluated at runtime by an LLM. Execution only proceeds along this edge if the condition is satisfied.
**Use when:** The next step depends on conversation context, collected data, or a specific outcome.
* **Condition** — write the condition in plain English, e.g. `"The patient confirmed their appointment"` or `"The user requested a callback"`
* **Priority** — when multiple conditional edges leave a node, priority determines evaluation order
Write conditions as complete, specific statements about what must be true for the edge to activate. The runtime LLM evaluates these against the full conversation context.
**Parallel execution** — the target node runs alongside the primary flow without blocking it. The source node does not wait for the companion to complete before continuing.
**Use when:** You want to trigger a background action (e.g., logging, sending an SMS) while the main conversation continues.
## Global Variables
Global Variables are team-level key-value pairs automatically injected into every workflow execution. Use them in prompts, messages, and tool inputs via `{{variable_name}}` syntax.
Navigate to **Settings → Global Variables** and click **New Variable**.
Set a name, value, optional description, and category for grouping.
Reference any global variable inside a node's system prompt, message body, or HTTP request using `{{variable_name}}`.
| Field | Description |
| ------------- | --------------------------------------------------------------------------------------------- |
| `name` | Unique identifier — alphanumeric and underscores only, must start with a letter or underscore |
| `value` | The variable's value — can be plain text, JSON, or a full system prompt |
| `description` | Human-readable description (max 1024 chars) |
| `category` | Grouping label, e.g. `Prompts`, `Config`, `Credentials` |
| `is_secret` | If enabled, value is masked in list responses |
The following names are reserved and cannot be used for custom global variables:
`now`, `date`, `time`, `year`, `month`, `day`, `hour`, `minute`, `workflow_invoke_count`
These are automatically injected by the runtime with current date/time context and execution metadata.
If a user-provided dynamic variable shares the same name as a global variable, the user-provided value takes precedence at execution time.
## Publishing a Version
Interactly tracks every change to your workflow as a version. Version 0 is created automatically when you first create the workflow. When you're ready to go live, activate the version you want to use for execution.
All node and edge changes are saved automatically. Use the **Save** button to explicitly commit the current canvas state to the active version.
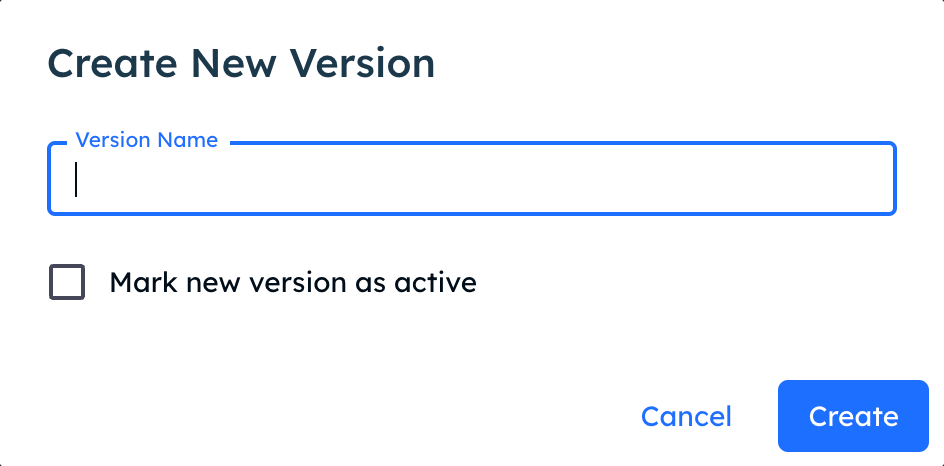
To snapshot the current state before making further changes, click **New Version**. Give it a meaningful name like `"v1 — Initial Release"` or `"v2 — Add Callback Branch"`.
## Adding Nodes
Nodes are the building blocks of a workflow. Each node performs one discrete action — generating an LLM response, calling an API, sending an SMS, or controlling conversation flow.
### Node Categories
**Conversational and reasoning steps**
* `SAY_LLM` — generate a conversational response via LLM
* `WORKER_LLM` — structured output or background reasoning
* `SAY_STATIC` — output a predefined or random static message
**External actions and API calls**
* `TOOL_NODE` — execute a registered tool (function, Python, API, KB)
* `HTTP_REQUEST` — call any REST endpoint directly
**Messaging and call control**
* `SEND_SMS` — send an SMS to the contact
**Internal execution management**
* `WORKFLOW_RUN_FETCH` — retrieve a previous workflow run
* `WORKFLOW_RUN_EVALUATOR` — evaluate run outputs
### Configuring a Node
Click **Add Node** on the canvas or drag a node type from the palette. Each node type has its own configuration panel:
The primary node for LLM-driven conversational responses.
* **Name** — label for this node on the canvas
* **LLM Provider** — select from Azure OpenAI, OpenAI, Google, Anthropic, AWS Bedrock, or Custom
* **Model** — choose the model for this node
* **System Prompt** — instructions for the LLM (supports `{{variable}}` syntax)
* **Tools** — attach tools the LLM can call during this step
* **Max Turns** — limit conversation turns at this node
* **Temperature / Max Tokens** — generation parameters
For background reasoning or structured data extraction — not exposed directly to the user.
* **Name**, **LLM Provider**, **Model** — same as SAY\_LLM
* **System Prompt** — task instructions for the worker
* **Output Schema** — define a JSON schema for structured outputs
* **Tools** — attach tools for extended capabilities
Call any external REST API from within your workflow.
* **URL** — target endpoint (supports `{{variable}}` substitution)
* **Method** — GET, POST, PUT, PATCH, DELETE
* **Headers** — key-value pairs (supports secrets via global variables)
* **Body** — JSON payload (supports `{{variable}}` substitution)
* **Response Mapping** — map response fields to workflow variables
Send an SMS message to the contact mid-workflow.
* **To** — phone number or `{{variable}}` reference
* **Message** — SMS body with `{{variable}}` support
* **Provider** — configured SMS provider for your team
Execute a tool from the tool registry.
* **Tool** — select from registered tools (inbuilt, inline Python, external API, or Knowledge Base)
* **Input Mapping** — map workflow variables to tool input fields
* **Output Mapping** — map tool output fields back to workflow variables
## Connecting Nodes with Edges
Edges define how execution flows between nodes. After placing your nodes, connect them by drawing edges on the canvas.
### Edge Types
**Unconditional transition** — execution moves from the source node to the target node immediately after the source completes.
**Use when:** The next step is always the same, regardless of what happened at the source node.
**LLM-evaluated routing** — a natural language condition is evaluated at runtime by an LLM. Execution only proceeds along this edge if the condition is satisfied.
**Use when:** The next step depends on conversation context, collected data, or a specific outcome.
* **Condition** — write the condition in plain English, e.g. `"The patient confirmed their appointment"` or `"The user requested a callback"`
* **Priority** — when multiple conditional edges leave a node, priority determines evaluation order
Write conditions as complete, specific statements about what must be true for the edge to activate. The runtime LLM evaluates these against the full conversation context.
**Parallel execution** — the target node runs alongside the primary flow without blocking it. The source node does not wait for the companion to complete before continuing.
**Use when:** You want to trigger a background action (e.g., logging, sending an SMS) while the main conversation continues.
## Global Variables
Global Variables are team-level key-value pairs automatically injected into every workflow execution. Use them in prompts, messages, and tool inputs via `{{variable_name}}` syntax.
Navigate to **Settings → Global Variables** and click **New Variable**.
Set a name, value, optional description, and category for grouping.
Reference any global variable inside a node's system prompt, message body, or HTTP request using `{{variable_name}}`.
| Field | Description |
| ------------- | --------------------------------------------------------------------------------------------- |
| `name` | Unique identifier — alphanumeric and underscores only, must start with a letter or underscore |
| `value` | The variable's value — can be plain text, JSON, or a full system prompt |
| `description` | Human-readable description (max 1024 chars) |
| `category` | Grouping label, e.g. `Prompts`, `Config`, `Credentials` |
| `is_secret` | If enabled, value is masked in list responses |
The following names are reserved and cannot be used for custom global variables:
`now`, `date`, `time`, `year`, `month`, `day`, `hour`, `minute`, `workflow_invoke_count`
These are automatically injected by the runtime with current date/time context and execution metadata.
If a user-provided dynamic variable shares the same name as a global variable, the user-provided value takes precedence at execution time.
## Publishing a Version
Interactly tracks every change to your workflow as a version. Version 0 is created automatically when you first create the workflow. When you're ready to go live, activate the version you want to use for execution.
All node and edge changes are saved automatically. Use the **Save** button to explicitly commit the current canvas state to the active version.
To snapshot the current state before making further changes, click **New Version**. Give it a meaningful name like `"v1 — Initial Release"` or `"v2 — Add Callback Branch"`.
 Click **Activate** on the version you want to use for live execution. All subsequent executions — triggered manually, via schedule, or via webhook — will run this version by default.
Activating a version does not interrupt runs already in progress. In-flight executions continue on the version they started with.
## Workflow Management
### Clone a Workflow
Duplicate an existing workflow to use it as a starting point:
* Click the **three-dot menu** on a workflow card and select **Clone Workflow**
* Choose to clone all versions or specific version numbers
* Give the clone a new name — all nodes, edges, and configuration are copied
### Edit a Workflow
* Click the **three-dot menu** and select **Edit** to re-open the builder
* Changes apply to the currently selected version
* Activate the updated version when ready to go live
### Delete a Workflow
* Click the **three-dot menu** and select **Delete**
* All versions and run history associated with the workflow are permanently removed
Workflow deletion is irreversible. All versions and historical run data will be lost.
### Concurrency Limits
Control how many instances of a workflow can run simultaneously:
* **Team-level limit** — set by Interactly for your organisation (default: 50 concurrent runs)
* **Per-workflow limit** — optionally configure a lower cap for a specific workflow via **Settings → Concurrency**
Per-workflow limits are always within your team-level ceiling. Setting a per-workflow limit to `0` removes the per-workflow cap and falls back to the team limit.
## Workflow Run Status
Once a workflow is executing, runs progress through the following states:
Execution has been initiated and the runtime is initializing the workflow graph.
The workflow is actively traversing nodes and processing the conversation or task.
Execution reached an `END_CONVERSATION` node successfully. All outputs and events are recorded.
An unrecoverable error occurred during execution. Error details are logged in the run record.
Execution was manually stopped before reaching an end node.
## API Reference
**POST /workflows**
Create a new workflow programmatically with full configuration
**PATCH /workflows/:id**
Update nodes, edges, and settings for a specific version
**POST /nodes**
Add a node to your workflow configuration
**POST /edges**
Connect two nodes with a direct, conditional, or companion edge
**POST /workflows/:id/execute**
Trigger a workflow run with optional version and input overrides
**GET /global-variables**
List, create, and manage team-level global variables
## Next Steps
Full reference for all node types, configuration fields, and use cases
Attach tools, external APIs, and Knowledge Bases to LLM nodes
Manage versions, compare diffs, and roll back safely
Test your workflow interactively before going live
Click **Activate** on the version you want to use for live execution. All subsequent executions — triggered manually, via schedule, or via webhook — will run this version by default.
Activating a version does not interrupt runs already in progress. In-flight executions continue on the version they started with.
## Workflow Management
### Clone a Workflow
Duplicate an existing workflow to use it as a starting point:
* Click the **three-dot menu** on a workflow card and select **Clone Workflow**
* Choose to clone all versions or specific version numbers
* Give the clone a new name — all nodes, edges, and configuration are copied
### Edit a Workflow
* Click the **three-dot menu** and select **Edit** to re-open the builder
* Changes apply to the currently selected version
* Activate the updated version when ready to go live
### Delete a Workflow
* Click the **three-dot menu** and select **Delete**
* All versions and run history associated with the workflow are permanently removed
Workflow deletion is irreversible. All versions and historical run data will be lost.
### Concurrency Limits
Control how many instances of a workflow can run simultaneously:
* **Team-level limit** — set by Interactly for your organisation (default: 50 concurrent runs)
* **Per-workflow limit** — optionally configure a lower cap for a specific workflow via **Settings → Concurrency**
Per-workflow limits are always within your team-level ceiling. Setting a per-workflow limit to `0` removes the per-workflow cap and falls back to the team limit.
## Workflow Run Status
Once a workflow is executing, runs progress through the following states:
Execution has been initiated and the runtime is initializing the workflow graph.
The workflow is actively traversing nodes and processing the conversation or task.
Execution reached an `END_CONVERSATION` node successfully. All outputs and events are recorded.
An unrecoverable error occurred during execution. Error details are logged in the run record.
Execution was manually stopped before reaching an end node.
## API Reference
**POST /workflows**
Create a new workflow programmatically with full configuration
**PATCH /workflows/:id**
Update nodes, edges, and settings for a specific version
**POST /nodes**
Add a node to your workflow configuration
**POST /edges**
Connect two nodes with a direct, conditional, or companion edge
**POST /workflows/:id/execute**
Trigger a workflow run with optional version and input overrides
**GET /global-variables**
List, create, and manage team-level global variables
## Next Steps
Full reference for all node types, configuration fields, and use cases
Attach tools, external APIs, and Knowledge Bases to LLM nodes
Manage versions, compare diffs, and roll back safely
Test your workflow interactively before going live